
Experiencing unexpected movement in your game character or camera? You may be dealing with stick drift on your Xbox controller.
This common issue affects both Xbox One and Xbox Series X/S models, often disrupting gameplay and response times.
Fortunately, many stick drift problems can be resolved without replacing the controller. In this guide, we explore effective solutions, from quick resets and cleaning techniques to firmware updates and advanced repairs, helping UK gamers restore smooth control.
What Is Stick Drift on an Xbox Controller and Why Does It Happen?

Stick drift is a common issue among Xbox gamers and is typically caused by faults in the analogue stick’s sensor system.
The potentiometers inside the joystick base are responsible for translating physical movement into digital input.
When dust, wear, or misalignment affects these sensors, the controller may register phantom input, causing movement on screen without any physical action from the user.
Several factors can contribute to the development of stick drift over time:
- Dust and dirt entering the controller housing and accumulating inside the joystick mechanism
- Physical wear of internal components, especially from frequent gaming sessions
- Impact damage caused by dropping or mishandling the controller
- Defective potentiometers or loss of resistance in the electrical circuit
- Outdated firmware or calibration mismatches within the controller’s software interface
Both Xbox One and Xbox Series X/S controllers use similar thumbstick architecture, making them susceptible to drift in similar ways.
How Can You Identify Stick Drift Symptoms on Xbox Controllers?
The first indication of stick drift is often observed during gameplay. Characters might move even when no input is given, or the camera angle may slowly shift.
These signs are especially noticeable in games requiring precision, such as first-person shooters or racing games.
To verify whether the issue lies with the controller and not the game or console:
- Open the Xbox Accessories app on your console or PC.
- Connect the affected controller.
- Use the built-in Input Test to observe real-time stick movement.
- Watch for any input signals being sent from the stick when it’s in a neutral position.
If the on-screen cursor shifts without any physical movement, stick drift is present and corrective steps are required.
What Are the Quickest Fixes for Xbox Controller Drift?
There are a few quick fixes that users can try before resorting to disassembly or hardware repair. These are basic steps that address temporary drift caused by power issues or minor glitches.
Reset the Controller
- Press and hold the Xbox button for approximately 10 seconds until the controller shuts down
- Wait for a few seconds, then press the button again to restart the device
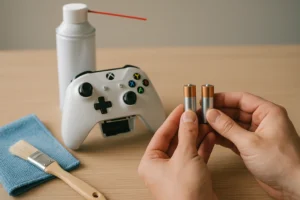
Replace the Batteries
- Remove the battery cover
- Replace with new AA batteries or a fully charged battery pack
- Restart the controller and test the input
Reconnect the Controller
- Disconnect the controller from the console or PC
- Reconnect via USB cable or wireless pairing
- Ensure that no other devices are causing interference
These steps are often enough to resolve transient software or power-related stick drift issues.
How Do You Clean Xbox Controller Sticks to Stop Drift?
Cleaning the analogue sticks is one of the most effective ways to address stick drift without dismantling the controller. Dust and debris frequently enter the housing around the base of the sticks and interfere with their smooth movement.
Cleaning Method Using Isopropyl Alcohol
- Power off the controller completely.
- Dampen a cotton swab or microfibre cloth with 70% isopropyl alcohol.
- Gently clean around the base of each joystick.
- Move the stick in all directions while cleaning to expose all sides.
- Allow the alcohol to dry completely before using the controller again.
This method helps dissolve and remove dirt and oil that can hinder the potentiometer’s accuracy.
Using Compressed Air
If dry particles are stuck deeper in the mechanism, compressed air can help dislodge them.
- Hold the controller with the stick pushed to one side
- Spray compressed air in short bursts around the base of the stick
- Slowly rotate the stick while continuing to spray
- Repeat for the second analogue stick
Avoid holding the can upside down, as this may release moisture into the controller which can cause further internal damage.
Can You Recalibrate an Xbox Controller to Fix Stick Drift?
Recalibration can sometimes correct input inaccuracies resulting from software misalignment. This method is particularly effective when stick drift occurs after updates or controller pairing issues.
Steps to Recalibrate the Controller
- Connect the controller to the Xbox console via USB or wirelessly.
- Open Settings > Devices & connections > Accessories.
- Select the affected controller from the list.
- Choose Configure > Test mode and look for input anomalies.
- If recalibration is available, follow the instructions to reset stick sensitivity.
It is important to note that recalibration will not fix physical damage or worn-out components, but it can resolve software-based drift.
Is Updating Your Xbox Controller Firmware Necessary to Fix Drift?
Firmware updates often include bug fixes and performance optimisations. These can address inconsistencies in signal interpretation that lead to perceived stick drift.
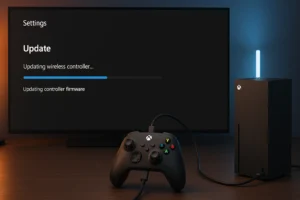
How to Update Xbox Controller Firmware?
- Connect the controller to the Xbox using a USB-C cable.
- Go to Settings > Devices & connections > Accessories.
- Select the controller and choose Firmware version > Update now.
- Follow the on-screen instructions to complete the update.
Once the firmware is up to date, test the controller again using the Input Test tool to check if the drift has improved or disappeared.
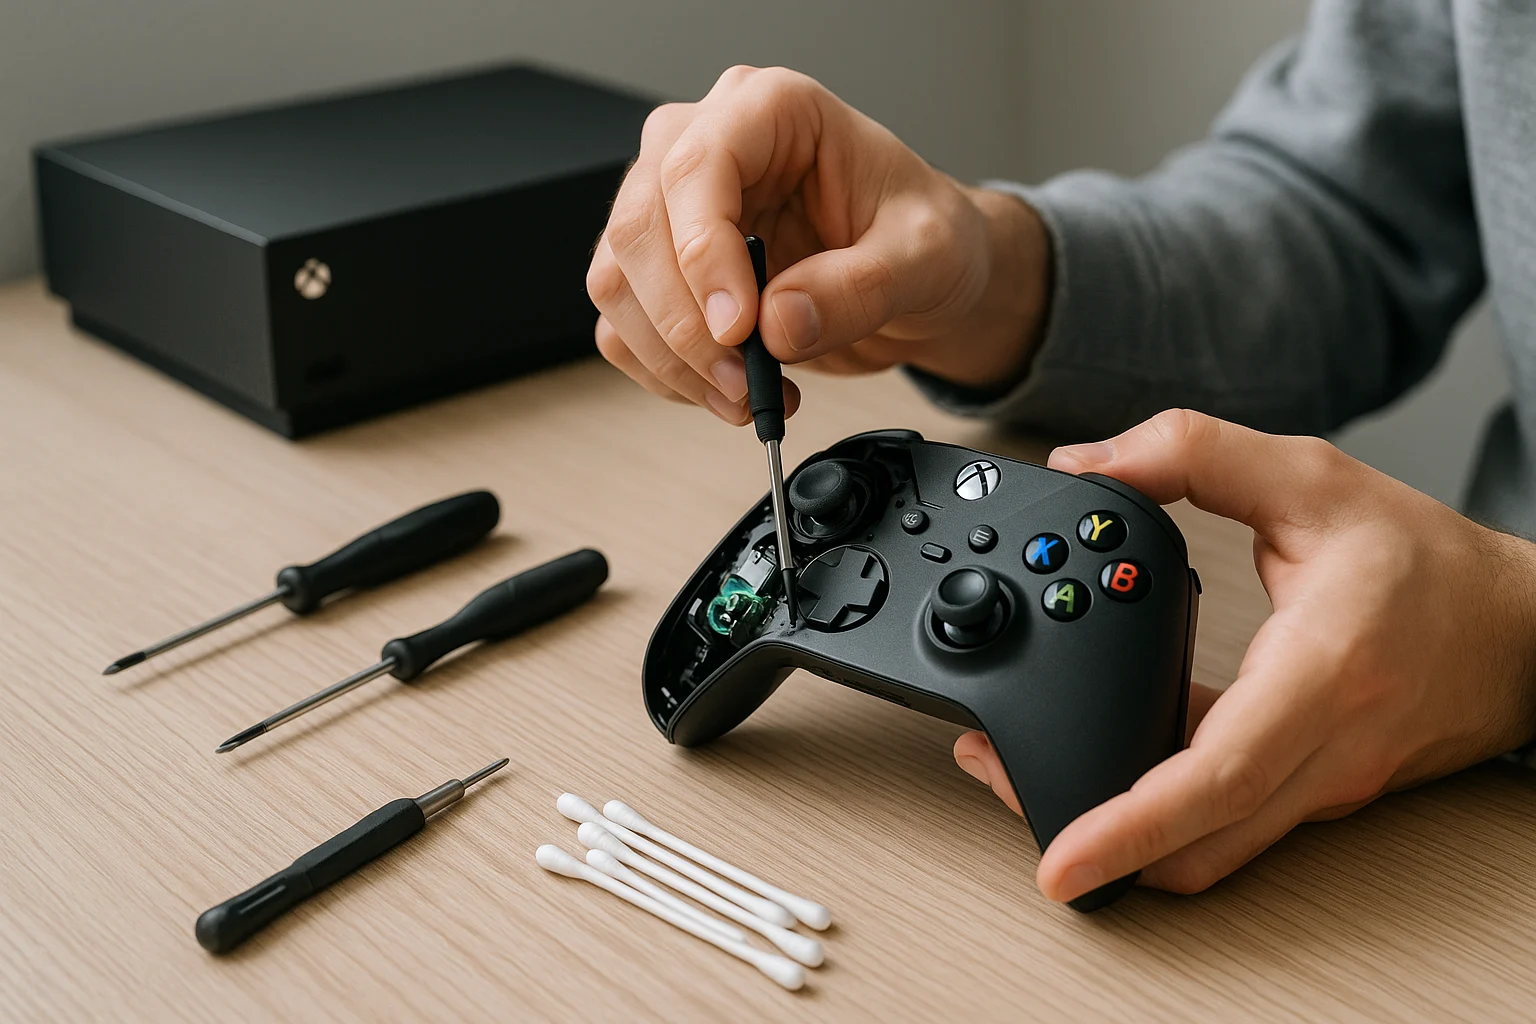
What Should You Do If Cleaning and Calibration Don’t Work?
In cases where external cleaning and software adjustments fail, the internal joystick module may need to be replaced.
The joystick assembly consists of moving parts that wear down over time. Replacing them requires technical skills, proper tools, and access to replacement components.
Options to Consider
- Check Warranty Status: If the controller is still under Microsoft’s standard 12-month warranty, a free replacement or repair may be available.
- DIY Repairs: Users comfortable with electronics can open the controller, desolder the faulty module, and install a new one.
- Professional Repairs: Services specialising in console and controller repairs offer joystick module replacement with minimal risk.
Attempting DIY repair without proper tools or skills can cause irreversible damage. It’s often safer to consult a certified repair technician.
How Do You Prevent Xbox Stick Drift in the Future?
Preventative care plays an essential role in extending the life of an Xbox controller. Regular maintenance and careful handling can delay or entirely prevent stick drift.
Best Practices for Controller Maintenance
- Store controllers in a clean, dust-free environment when not in use
- Avoid applying excessive force or pressure to the thumbsticks
- Periodically clean the exterior and stick base with a dry cloth or isopropyl alcohol
- Use controller covers or cases to reduce exposure to dust and sweat
Environmental factors such as humidity and dust levels also contribute to the degradation of internal components. Keeping the controller dry and protected from direct sunlight or spills is essential.
Xbox One vs Xbox Series X/S Controller Drift: What’s the Difference?
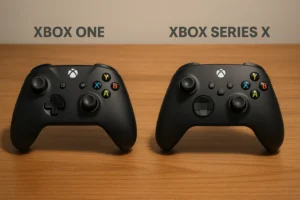
Though both Xbox One and Series X/S controllers share similar joystick mechanisms, there are minor hardware differences that affect their sensitivity to drift.
The Series X/S controller has a slightly updated internal design, but this has not completely eliminated the issue.
Comparison of Controller Drift Behaviour
| Feature | Xbox One Controller | Xbox Series X/S Controller |
| Frequency of Drift | Moderate | Slightly Higher |
| Potentiometer Type | Standard | Revised but similar |
| Recalibration Tool Access | Limited | Built-in on Xbox OS |
| Firmware Update Support | Yes | Yes |
| DIY Repair Difficulty | Moderate | Moderate to Advanced |
Both generations benefit from similar cleaning and recalibration techniques. However, firmware updates and configuration tools are more refined in the newer models, offering better software-level troubleshooting.
Fix Methods Across Controller Models
| Fix Method | Xbox One Compatible | Xbox Series X/S Compatible | Skill Level Required | Approximate Time |
| Soft Reset | Yes | Yes | Basic | 2–5 minutes |
| Replace Batteries | Yes | Yes | Basic | 2 minutes |
| Clean with Isopropyl | Yes | Yes | Intermediate | 10 minutes |
| Compressed Air Cleaning | Yes | Yes | Intermediate | 10–15 minutes |
| Recalibration via Software | Limited | Full Access | Intermediate | 5–10 minutes |
| Firmware Update | Yes | Yes | Basic | 5 minutes |
| Replace Joystick Module | Yes | Yes | Advanced | 30–60 minutes |
Regular application of simple fixes such as cleaning and software updates can prevent the need for more complex solutions. Knowing when and how to escalate your approach can save both time and money in the long term.
Conclusion
Stick drift can be frustrating, but it doesn’t always mean your Xbox controller is beyond repair.
With the right approach whether it’s a simple cleaning, a firmware update, or a recalibration you can often fix the problem at home.
For more persistent issues, replacement parts or professional repair may be the best route.
Understanding the cause and applying targeted solutions ensures better controller performance and a longer device lifespan, keeping your gaming experience enjoyable and responsive.
FAQs About Xbox Controller Stick Drift
How do I know if my Xbox controller is drifting?
Stick drift is evident when your in-game character or camera moves without any input from the analog stick. You can confirm it using the Xbox Accessories testing tool.
Can stick drift be fixed permanently?
In many cases, yes. Cleaning and updating the firmware can permanently fix the issue. However, if internal components are worn out, only replacement or professional repair will solve it long-term.
Is stick drift covered under Xbox controller warranty?
Yes, if the controller is still within the one-year standard warranty period. Microsoft may offer free repair or replacement.
What tools do I need to replace an Xbox joystick module?
You’ll need a Torx screwdriver set, a soldering iron, and replacement joystick modules. A prying tool is also useful for opening the controller casing.
How often should I clean my controller to prevent drift?
A light cleaning every two to four weeks is recommended, depending on your usage and environment.
Does Xbox Elite Controller experience stick drift too?
Yes, despite being premium models, Xbox Elite controllers are also susceptible to stick drift due to similar internal mechanics.
Is there a software tool to diagnose stick drift on Xbox?
The Xbox Accessories app on Xbox and PC includes a testing tool that can visually show input from the thumbsticks to diagnose drift.